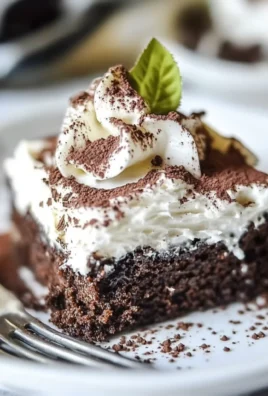
Lemon Icebox Cake is a timeless no-bake dessert that combines a creamy, citrusy filling with layers of cookies or crackers. This chilled treat is perfect for warm weather, offering a refreshing and tangy flavor with a smooth texture. It requires minimal effort, making it a go-to option for both beginner and experienced home bakers.

This dessert’s origins trace back to the early 20th century when refrigeration became common in households. Icebox cakes became a popular way to prepare layered desserts without using an oven. Today, the Lemon Icebox Cake remains a favorite, with various modern twists, from gluten-free versions to keto-friendly adaptations.
History & Cultural Significance
Icebox cakes emerged in the 1920s as a response to evolving kitchen technology. Before electric refrigeration, desserts often relied on traditional baking methods. With the rise of the “icebox,” or early refrigerator, no-bake desserts gained popularity, especially in the Southern United States. The combination of tangy lemon and creamy filling made this variation stand out.
Unlike other layered desserts, such as tiramisu or trifle, Lemon Icebox Cake offers a unique balance of sweet and tart. Over time, variations using different cookies, alternative dairy products, and infused flavors have developed, making it a versatile dish that appeals to a broad audience.
Preparation Phase & Essential Tools
Tools Needed for This Recipe
To make a Lemon Icebox Cake successfully, having the right tools ensures a smooth process. Some essential kitchen equipment includes:
- Mixing bowls – For preparing the lemon cream filling.
- Hand or stand mixer – Ensures a smooth, fluffy consistency.
- Offset spatula – Helps evenly spread layers.
- Springform pan or baking dish – Provides structure to the cake while chilling.
- Measuring cups and spoons – Ensures precise ingredient ratios.
Importance of Each Tool
- Mixing bowls allow you to whip the filling without overflow.
- A hand or stand mixer creates a creamy, thick filling that holds its shape.
- An offset spatula ensures even layers, preventing air pockets.
- A springform pan or baking dish shapes the cake, making it easy to slice.
- Measuring tools help maintain consistency, ensuring the correct balance of tartness and sweetness.
Preparation Tips for the Best Lemon Icebox Cake
- Chill the mixing bowl and beaters before whipping cream for better volume.
- Use room temperature ingredients for a smoother blend.
- Layer ingredients evenly to prevent a lopsided cake.
- Refrigerate for at least 4 hours (preferably overnight) to allow flavors to meld.
- Use parchment paper lining for easier removal if using a pan.
Ingredient List
Main Ingredients
- 2 cups heavy whipping cream – Creates a light, airy texture.
- 1 cup sweetened condensed milk – Adds sweetness and creaminess.
- ½ cup lemon curd – Intensifies the lemon flavor.
- 2 tbsp fresh lemon juice – Enhances the tartness.
- 1 tsp vanilla extract – Balances the citrus with warmth.
- 2 cups graham crackers (or lemon cookies), crushed – Forms the cake layers.
- 1 tbsp lemon zest – Provides a fresh, citrusy aroma.
Optional Additions
- Fresh berries – Adds color and natural sweetness.
- White chocolate shavings – Enhances creaminess.
- Mint leaves – Offers a decorative, fresh touch.
Step-by-Step Instructions
Step 1: Prepare the Lemon Cream Filling
- In a chilled mixing bowl, whip heavy cream until soft peaks form.
- Slowly add sweetened condensed milk and continue whipping.
- Fold in lemon curd, fresh lemon juice, and vanilla extract.
- Mix until smooth and thickened.
Step 2: Prepare the Cookie Layers
- Line a baking dish or springform pan with parchment paper.
- Arrange a single layer of graham crackers or lemon cookies at the bottom.
Step 3: Assemble the Cake
- Spread a portion of the lemon cream filling over the cookie base.
- Repeat the process, alternating between cookie layers and filling.
- Finish with a final layer of cream and smooth the top with a spatula.
Step 4: Chill for Optimal Texture
- Cover the dish with plastic wrap.
- Refrigerate for at least 4 hours (preferably overnight).
- Allow the cake to firm up before slicing.
Step 5: Garnishing & Serving
- Sprinkle lemon zest on top for a bright, citrusy finish.
- Add fresh berries or white chocolate shavings for extra sweetness.
- Serve chilled with a drizzle of additional lemon curd if desired.
Troubleshooting & Common Mistakes
Why is my cake runny?
- Ensure the whipped cream is beaten to stiff peaks before layering.
- Refrigerate the cake for at least 4 hours to allow it to set.
Why are the layers too soft?
- Avoid over-soaking cookies in lemon juice or curd before layering.
- Choose sturdy cookies like graham crackers to hold their shape.
Can I make it dairy-free?
- Use coconut whipped cream instead of heavy cream.
- Replace sweetened condensed milk with a dairy-free alternative.
Side Dish & Beverage Pairings
Pairing the right side dishes and beverages with Lemon Icebox Cake enhances its citrusy, creamy flavors. Since the cake is light and refreshing, it pairs well with complementary textures and flavors.
Fruit-Based Pairings
- Citrus Berry Medley – A mix of strawberries, blueberries, and raspberries with a light honey drizzle.
- Tropical Fruit Salad – Mango, pineapple, and kiwi with a touch of lime juice for freshness.
- Caramelized Peaches – Lightly roasted peaches with a sprinkle of cinnamon and brown sugar.
Refreshing Beverages
- Lemon-Infused Iced Tea – Enhances the lemony flavors without overpowering the dessert.
- Sparkling Lemonade – A fizzy, slightly tart drink that balances the cake’s sweetness.
- Chilled Espresso or Affogato – The bitterness of coffee contrasts well with the sweet and creamy texture.
Dessert Accompaniments
- Almond Shortbread Cookies – A crunchy contrast to the soft layers of the cake.
- Greek Yogurt Parfait with Honey & Granola – Adds a tangy and creamy element while keeping it light.
- Cheese Platter with Brie and Fig Jam – A sophisticated option that complements the citrus notes.
Nutritional Breakdown & Health Benefits
Macronutrient Profile
Lemon Icebox Cake is a rich dessert that balances carbohydrates, fats, and proteins. The main sources of fats come from heavy whipping cream, while graham crackers or cookies contribute to the carbohydrate content. The citrus ingredients, such as lemon zest and juice, provide a boost of vitamins.
Healthier Ingredient Swaps
- Greek Yogurt Instead of Heavy Cream – Reduces fat content while maintaining creaminess.
- Sugar-Free Sweeteners – Options like monk fruit or stevia can replace sweetened condensed milk.
- Gluten-Free Crackers – Suitable for those with gluten sensitivities without sacrificing texture.
Benefits of Lemons in the Diet
- Rich in Vitamin C – Supports immune function and collagen production.
- Aids Digestion – Lemon juice can help with digestion and alkalizing the body.
- Contains Antioxidants – Helps reduce inflammation and oxidative stress.
Enjoying in Moderation
Lemon Icebox Cake is a delicious treat that can be enjoyed in moderation. Using smaller portions and pairing it with lighter sides can help balance the indulgence.
Common Mistakes & How to Perfect the Recipe
Preventing Soggy Layers
- Avoid oversaturating the cookies with lemon curd or juice before layering.
- Refrigerate long enough for the layers to set properly.
Balancing Sweetness & Tartness
- If the cake is too sweet, add extra lemon zest or a touch of Greek yogurt to balance flavors.
- For a tangier taste, increase the fresh lemon juice in the filling.
Achieving the Right Creamy Texture
- Whip the heavy cream until it forms stiff peaks before folding in other ingredients.
- Ensure all ingredients are at room temperature for smooth blending.
Chilling & Serving for the Best Results
- Refrigerate for at least four hours, preferably overnight, for the flavors to meld.
- Use a sharp knife to cut clean slices and serve immediately after slicing.
Storage, Reheating & Make-Ahead Tips
Proper Storage for Maximum Freshness
Lemon Icebox Cake needs to be stored properly to maintain its creamy texture and prevent sogginess. Keeping it in an airtight container in the refrigerator ensures it stays fresh and flavorful.
- Refrigerator: Store in a covered dish or airtight container for up to 5 days.
- Freezer: Wrap the cake in plastic wrap and then aluminum foil to prevent freezer burn. It can last up to 2 months.
How to Freeze and Thaw
If you want to prepare the cake ahead of time, freezing is an option. However, certain elements like fresh berries or whipped cream toppings should be added after thawing.
- Freezing: Assemble the cake, wrap it securely, and freeze for at least 4 hours or until firm.
- Thawing: Place it in the refrigerator for a few hours before serving to maintain the best texture.
Make-Ahead Preparation
Lemon Icebox Cake is an ideal make-ahead dessert. The longer it chills, the better the flavors meld together. Preparing it a day in advance ensures a well-formed, flavorful cake.
- For best results, assemble the cake at least 12 hours before serving.
- Add any delicate toppings, such as berries or whipped cream, just before serving.
Frequently Asked Questions (FAQs)
Can I use store-bought lemon curd instead of homemade?
Yes! Store-bought lemon curd works well in this recipe. However, homemade lemon curd offers a fresher, more vibrant flavor.
What type of cookies work best for layering?
Graham crackers, vanilla wafers, or shortbread cookies are great options. Lemon-flavored cookies add extra citrus flavor.
How do I make this dairy-free?
Substituting coconut whipped cream for heavy cream and using a dairy-free condensed milk alternative will work.
Can I make this sugar-free?
Yes! Using sugar-free sweetened condensed milk and low-carb cookies makes this a keto-friendly version.
How do I keep the layers from getting too soft?
Ensuring the cookies are layered evenly with the right amount of filling helps prevent them from becoming soggy. Chilling the cake long enough also ensures firmness.
What’s the best way to transport this dessert?
Keep the cake chilled in a secure, airtight container. Transport it in a cooler with ice packs if traveling a long distance.
Conclusion & Final Thoughts
Lemon Icebox Cake is a deliciously refreshing dessert that’s easy to make and perfect for any occasion. With its creamy layers and bright citrus flavor, it’s a crowd-pleaser that requires minimal effort.
This no-bake cake is ideal for summer gatherings, holiday meals, or simply when you crave something light and sweet. By following the storage and preparation tips, you can enjoy this treat at its best.
Try experimenting with different cookie bases, adding fruit, or even infusing herbs like basil or mint for a unique twist. However you make it, this classic dessert is sure to become a favorite!
Print
Lemon Icebox Cake
- Total Time: 6 hours
- Yield: 10 servings 1x
- Diet: Vegetarian
Description
A creamy, no-bake lemon icebox cake with layers of graham crackers, lemon cream filling, and fresh whipped topping. The perfect chilled dessert for any occasion.
Ingredients
For the Filling
- 2 cups heavy whipping cream
- 1 cup sweetened condensed milk
- ½ cup lemon curd
- 2 tablespoons fresh lemon juice
- 1 teaspoon vanilla extract
- 1 tablespoon lemon zest
For the Layers
- 2 cups graham crackers (or lemon cookies), crushed
Optional Toppings
- Fresh berries (strawberries, blueberries, raspberries)
- White chocolate shavings
- Mint leaves
Instructions
Step 1: Prepare the Lemon Cream Filling
- In a chilled mixing bowl, whip the heavy cream until soft peaks form.
- Gradually add the sweetened condensed milk while continuing to whip.
- Fold in the lemon curd, fresh lemon juice, vanilla extract, and lemon zest.
- Mix gently until fully combined and smooth.
Step 2: Prepare the Base Layer
- Line a 9×13-inch dish or springform pan with parchment paper.
- Arrange a single layer of graham crackers or lemon cookies at the bottom.
Step 3: Assemble the Cake
- Spread a portion of the lemon cream filling evenly over the cookie base.
- Add another layer of cookies, followed by more lemon filling.
- Repeat the layering process until the dish is full, finishing with a layer of cream.
Step 4: Chill for Best Texture
- Cover the dish with plastic wrap and refrigerate for at least 4 hours (preferably overnight).
- Let the cake set completely before serving.
Step 5: Garnish & Serve
- Sprinkle lemon zest over the top.
- Add fresh berries and white chocolate shavings if desired.
- Serve chilled and enjoy!
Notes
- For a stronger lemon flavor, increase the lemon zest or add extra lemon curd.
- Best when chilled overnight to allow the flavors to meld.
- Store leftovers in an airtight container in the refrigerator for up to 5 days.
- For a gluten-free version, use gluten-free cookies or crackers.
- Prep Time: 15 minutes
- Cook Time: 4-6 hours
- Category: Dessert
- Method: No-Bake
- Cuisine: Southern
Nutrition
- Calories: 290
- Sugar: 22g
- Sodium: 150mg
- Fat: 18g
- Saturated Fat: 11g
- Unsaturated Fat: Unsaturated Fat: 5g
- Trans Fat: 0g
- Carbohydrates: 30g
- Fiber: 1g
- Protein: 3g
- Cholesterol: 40mg


Leave a Comment